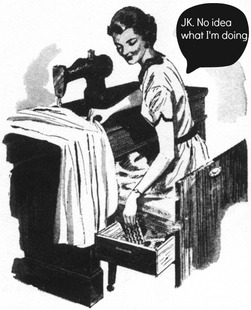
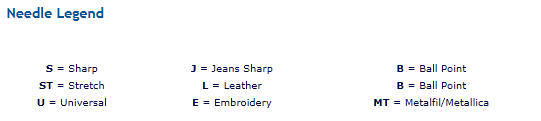
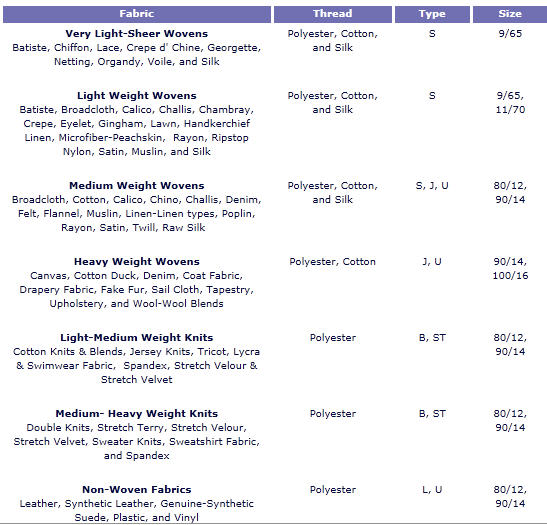
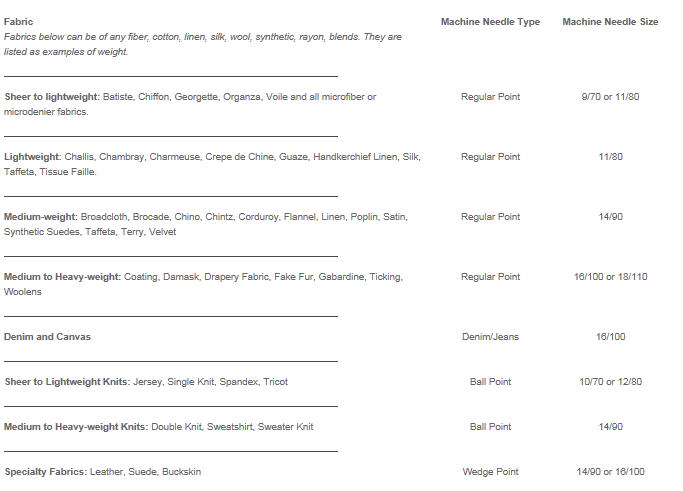
 Do you feel like this lady when you're standing in front of the machine needles at the craft store? Or maybe you used to know the difference and bought all the different types, but forgot how to read each kind... Then this post is for you! Most of my sewing is done with home decor fabrics, and many many layers of it, so I rely on heavy duty sewing machine needles. But this past summer, a little girl in my life requested a nightgown from knit fabric, so I went out and bought ballpoint needles because I heard from a little birdie (my mom...) that they make all the difference. Also, the lady at the Jo-Ann counter reminded me, while she was instructing me on how to cut my pattern out of the fabric with the stretch. Man, do I have a long way to go with clothes. We'll cover basic ground about sewing machine needles including the different parts, sizes, and types. Then, we'll put it all together and you'll even get to try your hand at a mini-quiz at the end. Refer back to this post (and the quiz!) to check if you're keeping up with your "needle readings". Let's dive in. Parts of the NeedleAll sewing machine needles have the same parts, lending the needle its basic function. But the differences between needles for heavy fabric and sheer fabric, for example, come from changing the shape and length of these parts. 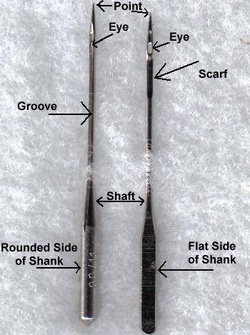 Shank: the upper portion. This is the part you insert into the machine, and often has a flat side and a rounded side to help guide the user on inserting it into the machine. This part is very stiff in a denim needle for extra sterngth. Shaft: this is the area from the bottom of the shank down to the point. It includes both the eye and the point. Groove: hard to see, easier to feel. The groove is on one side of the needle, leading into the eye, and it dictates what size of thread works best with what needles. Heavier threads need a needle with a larger groove. Scarf: the scarf is another groove, but on the side of the needle. This is what lets the bobbin thread catch the upper thread, forming the stitch. Point: this is, well, the point! It is the first part of the needle to make contact with the fabric. It pierces the fabric, and varies between types of needle depending on the fabric you use. When you are using knit versus woven fabrics, the type of needle you have comes into play. If you need a refresher on the difference between these fabrics, look at this short article from Threads magazine to learn some more about loops vs grain, stretch vs wrinkle test, and how the selvage differs between the two. Needle Sizing Each size sewing machine has a number, and knowing what these numbers mean will help ensure you are using the right needle for your project. This can enhance the quality of your project and/or fix some problems you may be having. There is an American and a European labeling system. American goes from 8 (fine) to 19 (thick). European goes from 60 (fine) to 120 (thick). Either way, larger numbers mean a heavier, stronger needle. So do you need to know both? No, but recognize on the needle packaging that you may see 8/60 or 19/120 - this is not sizes for two different parts of the needle, but referencing both labeling systems. And its not standardized if it will be American/Euro or Euro/American - but the labeling systems do not overlap, so you should be able to identify them if you remember the basic range. Let's check out some examples. What needle would you use? To sew a fine, sheer window curtain. You need a small needle (8/60). If you used a heavy 19/120 needle it would leave holes in the fabric. To sew heavy upholstery fabric. You need a strong 19/120 needle to pierce the fabric and support a strong thread. If you tried to use a 8/60, it would bend or break (which can be dangerous). To sew heavy topstitching on a lighter weight fabric. The heavy thread calls for a heavy needle, but that needle will make holes in your fabric. Try something in the middle, like 12/80. Types of NeedlesTypes of needles are categorized based on what type of fabric they are used for. The main differences are the point and the shank (the upper portion).  Universal: use with woven or knit fabric. This has a sharp but slightly rounded point, in between a sharp and ballpoint. If you don't like the stitches you are getting with the universal needle, switch to a sharp or ballpoint depending on if you are using woven or knit fabric. Ballpoint: for knit fabrics that have loop fibers. The point will glide through instead of catching and twisting the loops, making it bunch. These stitches won't be as straight as a sharp needle would achieve but a not-as-straight stitch will stretch easier with the knit fabric, preventing bunches after the project is done. Stretch: if your machine is skipping stitches while sewing with knits, you might be able to fix the problem by switching to a stretch needle. This choice is necessary for sewing lycra and swim wear. Sharp: use for all woven fabrics but is particularly helpful for top stitching. Leather: this point is wedge shaped to help pierce heavy, non-woven fabrics like leather. Denim: extra sharp point and very stiff shank to make a strong needle for tough heavy fabrics and multiple layers. 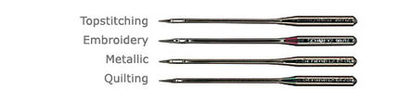 Topstitching: this needle has an extra large eye to accomdate thick thread that shows up better on your fabric. It also has a very sharp point to penetrate multiple layers. You can also use a denim needle for a topstitching needle. Machine embroidery: designed for dense embroidery designs without shreadding the rayon/polyester thread. Metallic: made for metallic threads, the eye of the needle is different to let the special thread flow smoothly through without shredding. Quilting: this needle has a tapered shape that helps it stitch through multiple layers and to flawlessly cross seams. 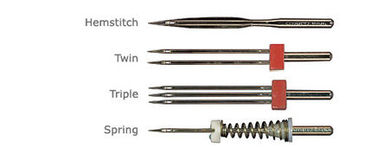 Hemstitch: also called a "wing" needle, this needle will spread the fabric fibers to create a hole as the design is stitched. This is used for heirloom sewing to reproduce the effect of tedious handwork. Twin: Two needles with one shank, and one needle is slightly shorter so the bobbin can still catch. The sizes are the same as regular needles but there is also a number that indicates how many millimeters apart the two needles are. If you see 4/80 twin needle, it is 4 mm between the needles and a size 80. To use this needle you need to use the extra spool pin on your sewing machine, check your owners manual. Triple: See the twin needle, its just triple. Spring: This needle combines a darning spring on the needle and is used for machine embroidery, monogramming, and free form quilting. Do you use Singer needles? I do. Here's a handy reference from their website with the style numbers for their needles. Regular Point (Style 2020) Ball Point (Style 2045) Chromium Regular Point for embroidery (Style 2000) Chromium Ball Point for embroidery (Style \ 2001) Denim or Jeans (Style 2026) Twin Needle (Style 2025) Hemstitch or Wing-Needle (Style 2040) Wedge-Point Leather/Vinyl (Style 2032) Putting It All Together - A Quiz!Taking what you've just read, could you apply it at the craft store? Let's try it out. Notice how the colors (sizes) are the same throughout the differences of needle style. 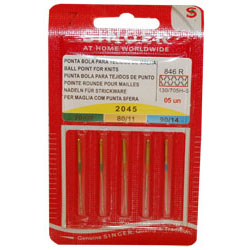 Singer Ball Point Style 2045 At the top we have the style number (type of needle). Then the different colors, coordinating with the shank, there are the difference sizes all found in one package. Green = 70/9, very sheer. Yellow is 80/11 for lightweight, and blue is 90/14 for midweight. So if you bought this, you would be working with knits (ballpoint) and have various sizes now available in your stash for different weights of knit fabric. 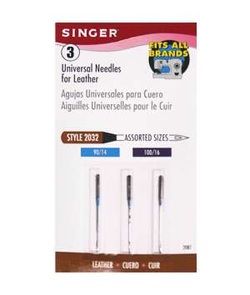 Singer Universal Leather Style 2032 Style dictated by color at the shank, then size with the band at the bottom. Light blue = 90/14, two purple 100/16. So one midweight, two heavier weight leathers. 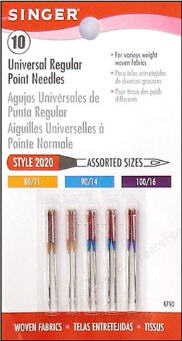 Singer Regular Point Style 2020 All are red, meaning regular point. Then there's yellow (80/11 lightweight), light blue (90/14 midweight) and purple (100/16 heavyweight). Questions? Leave a comment! 
2 Comments
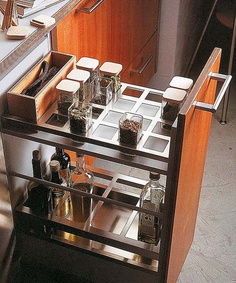
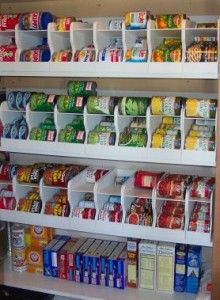
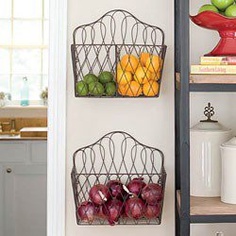
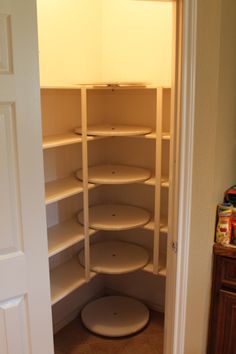
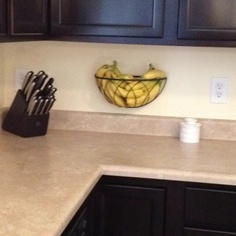
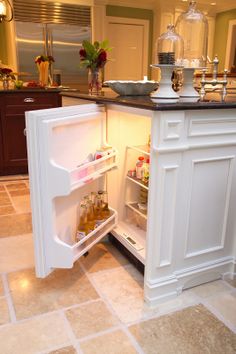
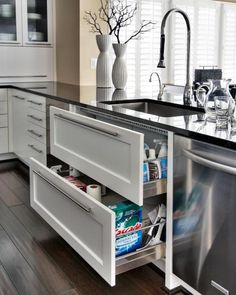
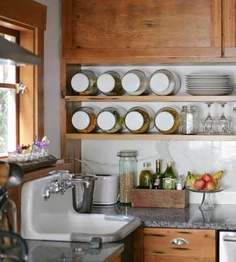
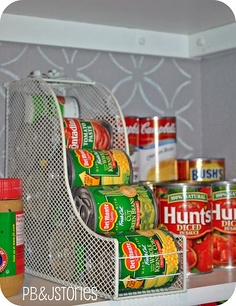
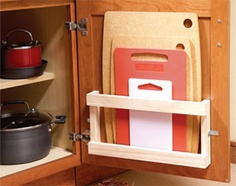
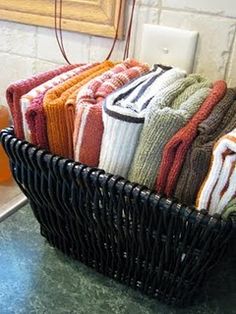
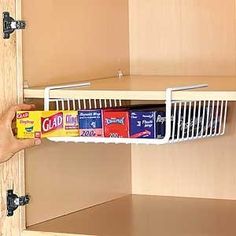
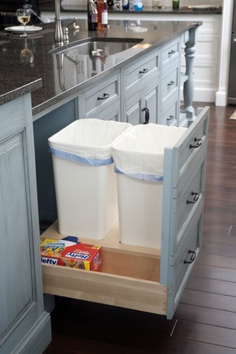
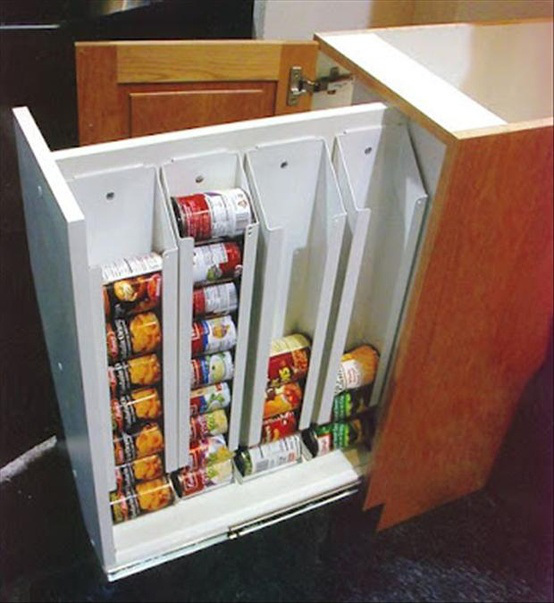
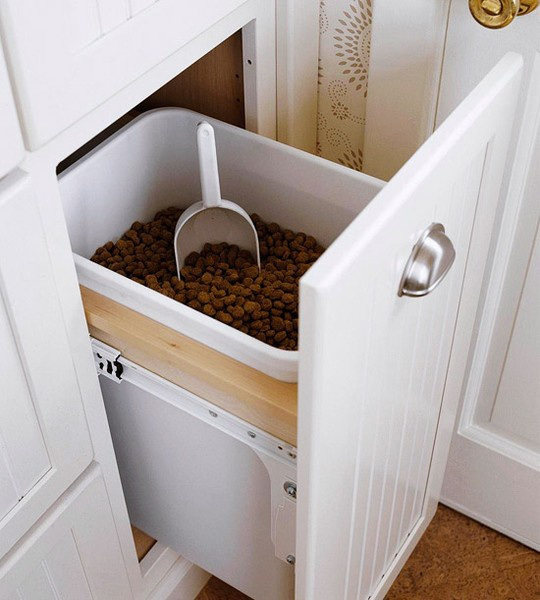
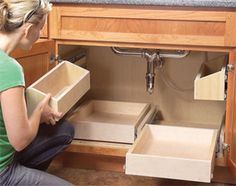
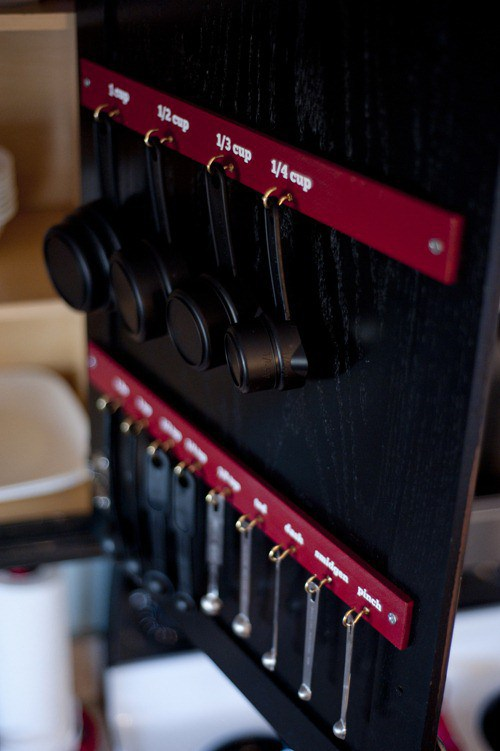
I am pleased to transfer this oh-so-popular kitchen organization and storage post from my old wordpress site over to my new weebly site! I have gotten some questions about knowing how to build some of these contraptions - I am not only updating this post with new ideas but also adding links (for as many as I can find). Update 12/31/13: Looking for DIY and where-to-buy for can storage photos featured here? Check out my Canned Goods Storage post. 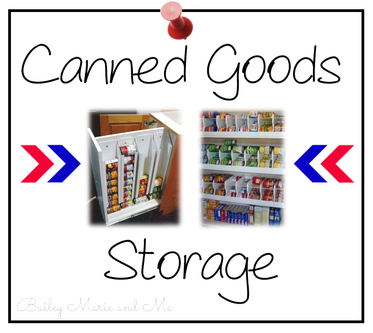 TutorialsThe links below will take you to some helpful websites for building, some of them even to the tutorials of some projects you see above in the gallery! Sliding Kitchen Drawers at www.familyhandyman.com Tutorial here: http://www.familyhandyman.com/kitchen/storage/how-to-build-kitchen-sink-storage-trays/step-by-step Pantry Lazy Susan Carousels > http://decorchick.com/all-you-wanted-to-know-about-the-pantry-carousels/ PVC Wine Rack at www.lowes.com Tutorial here: http://www.lowes.com/creative-ideas/kitchen-and-dining/store-and-stack-wine-rack/project Cabinet Cutting Board Rack at www.familyhandyman.com Tutorial here (scroll down): http://www.familyhandyman.com/storage-organization/home-organization-tips-and-storage-tips/step-by-step#step4 Spacing Out Pantry Shelves at The CSI Project: Creating Something Inspiring blog Blog post here: http://thecsiproject.com/2011/09/19/pretty-pantryin-my-own-style-2/#axzz2lsUaPumU Practical Kitchen Storage - Drawers at www.shelterness.com More ideas and link-ups to the products here: http://www.shelterness.com/57-practical-kitchen-drawer-organization-ideas/ Organizing Measuring Cups at Infarrantly Creative blog Tutorial here: http://www.infarrantlycreative.net/2011/08/organizing-measuring-cups-and-spoons.html I hope this was helpful! Leave a comment with any questions. Blessings,  With this new website, I have decided to make my tutorials on PDF documents and then upload here. By the way, if you haven't checked Weebly out it is truly amazing. Heres just a few reasons:
I started getting frustrated with Wordpress because photos wouldn't show up on the final post, they would be upside down, it was difficult to format things how I like, etc. But otherwise, I was a fan! Weebly's purpose is to be user friendly, and they surely have succeeded. Anyways, I have seen so many PDF tutorials over the past year that have adorable icons and images and I think it intimidated me! That's probably why I haven't made any tutorials via PDF yet...but I finally decided to google "how to make my own printables". This directed me towards a variety of blogs that had posted on this exact subject, and its these little "printables" that will make my tutorials great. Or I hope you think so. Almost every link actually linked back to this post from The SITS Girl. They provide a tutorial on how to use PicMonkey to make these printables. They also have tutorials on Microsoft Word and Photoshop. 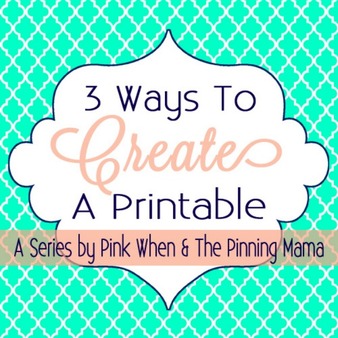 I've been playing around with PicMonkey and its amazing what it can do! There's so many options for text, clipart, frames, and effects - you could do anything! I'm excited to get started. That's my cue to sign off.  |
NewsletterSubscribers get first looks at new patterns, sales, giveaways, and more.
Archives
June 2022
Categories
All
Terms of Use: Please link back to my site if you use one of my original tutorials or photos!
|


 RSS Feed
