
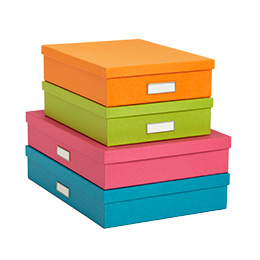
I stumbled across this beautiful box from Things That Are Pretty on Pinterest. When closed, it looks like just another cute box that you see in those chic, streamlined, all-white office photos in magazines. But when opened, you realize that it has everything you need for a productive office day...and its actually the stuff that usually clutters your desk. 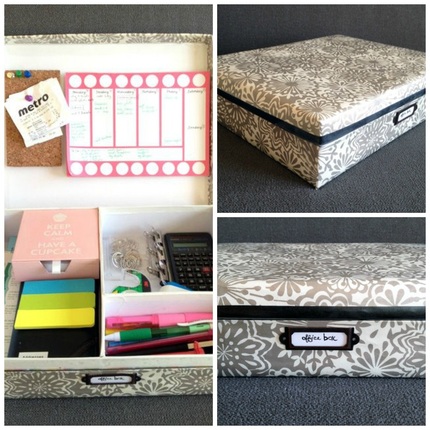
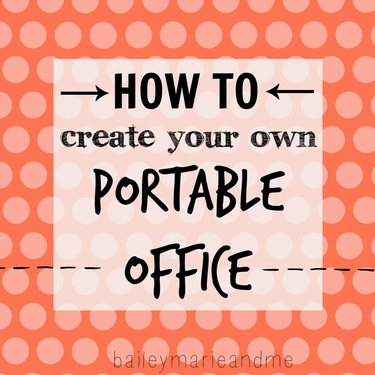
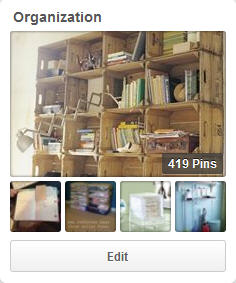
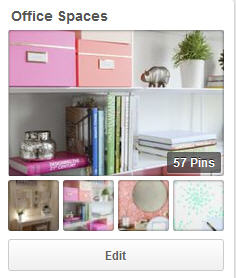
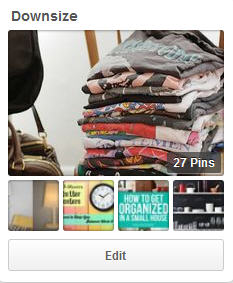
I am a sucker for anything organizational...and recently have embarked upon a preparatory journey to downsize in anticipation of moving to a small apartment in an urban metropolis as well as starting a busy life as a graduate student. Over the past 5 years I've enjoyed coming home to a "homey" apartment, but sometimes you just have to realize that the right comforter is all the decoration you need. Either way, I am constantly pinning new ideas to my Organization, Office Spaces, and Downsize Pinterest boards.
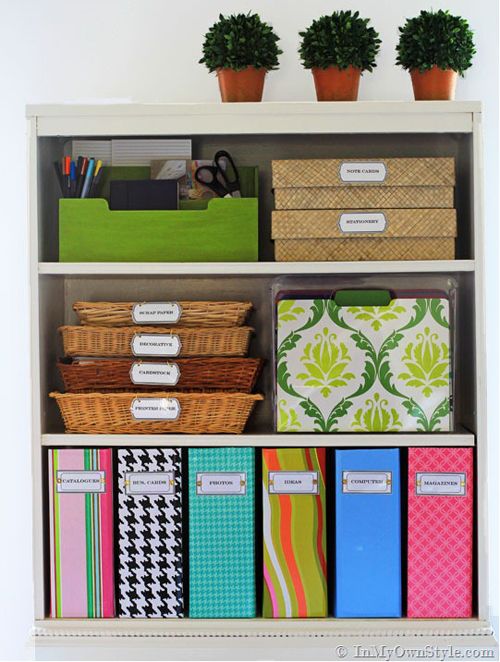
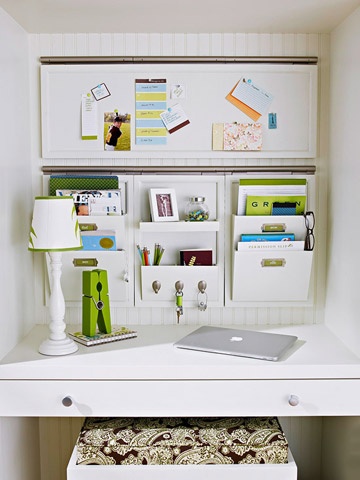
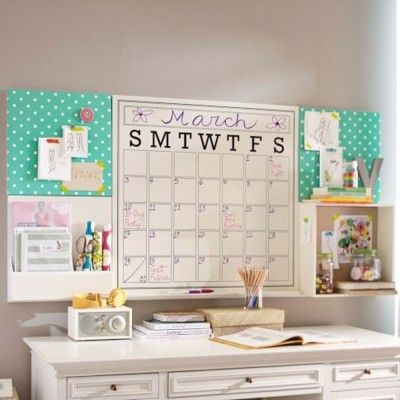
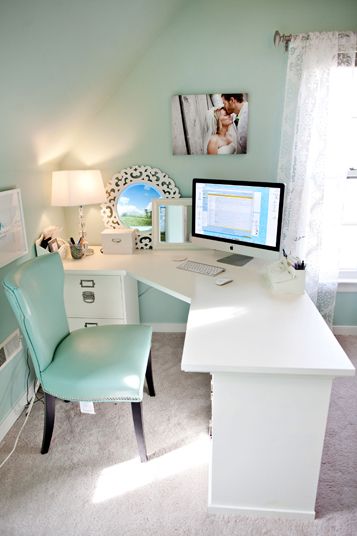
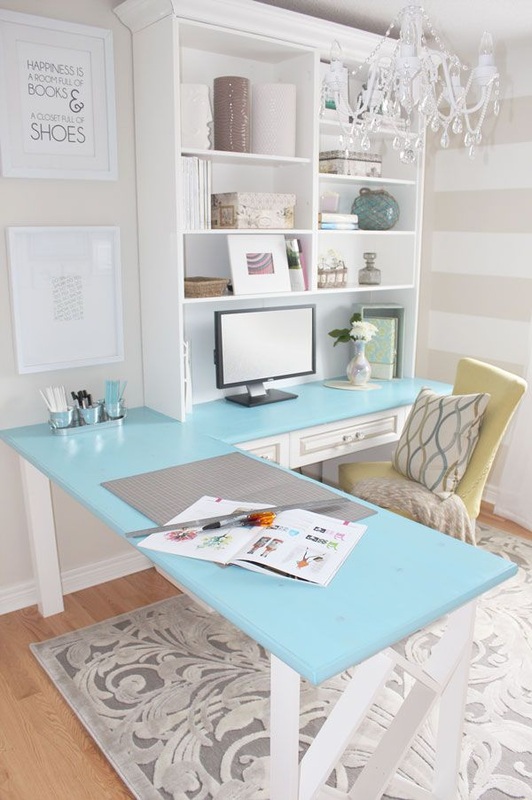
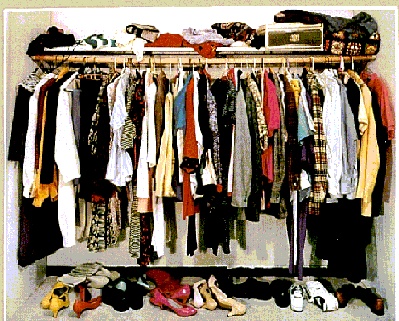
I mean, who can resist these offices?
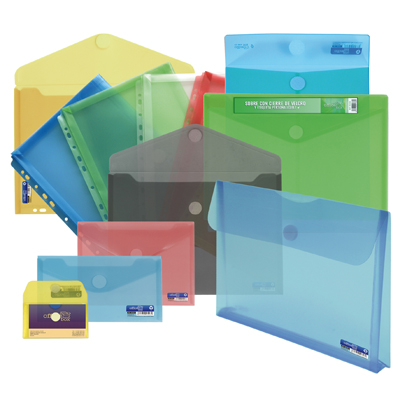
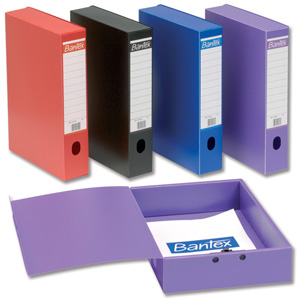
Sorry! Back to office-in-a-box. I did a quick Google search of "office box" to see what would come up...and no DIY projects returned, but a number of great office tools did. It seems like they come out with new box-binder-whatever! contraptions for organization and ease of travel these days, and its just too fast to keep up with. Another good search would be "portable office". I found this portable office post from OrgJunkie.
Whenever you organize, it's important to personalize. What works for the blogger you got the idea from might not work for you! Take the time to research what's out there, fit it to your space and to your needs, and go from there. Here's some examples of those nifty office organization items I found. Good luck to you!
- Bailey
0 Comments
but this time I'm serious.
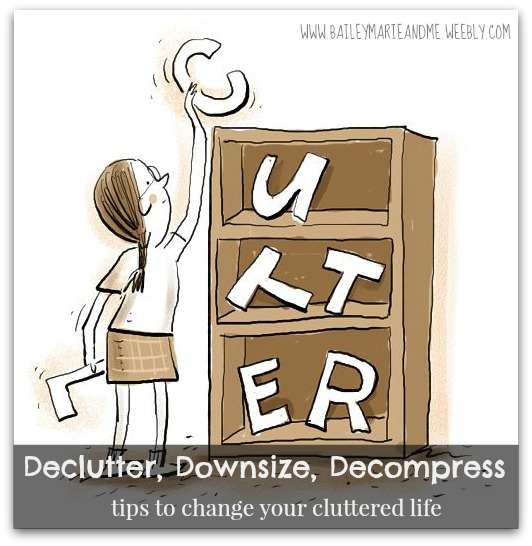
and when I'm serious, I make a new Pinterest board. 1. Declutter The first step in the process. I plan to start bringing home unnecessary things over the next few months before I officially have to move out and start "practicing" a decluttered, downsized life. This article at StyleatHome.com recommends thinning out your belongings 3 months before a downsizing move. But as I'm sure we all know, the first step to actually cleaning up can be daunting, which is why we typically never get around to it. - Make a list. What rooms do you want to de-clutter? I find breaking it down into even the parts of the room can help. Such as the closet, under the bed, top of the dresser, dresser drawers, bathroom counter, bathroom cabinets, etc. And it gives you something to cross off! - Little at a time. Set aside time each day (max 45 minutes) to clean up whichever part on your list. Remember WHY you're doing it. For me, coming home to a clean room makes me feel great inside. Put on some music, shut the door, and get to work! Jesenia over at TheLatinaHomemaker.com recommends starting with your surface areas - that means the counters, any clothes flung where they don't belong, etc. because it gives you that instant gratification and the OOMPH you need to move on to those scary drawers and closet corner. - What goes, what stays? Probably the hardest part of all. There's a number of tips on keeping only a certain amount of hangers in your closet, etc. and having your kids donate old toys each Christmas. But, I think it's all best addressed in the "Downsize" step. A word about trash. Remember to reuse, recycle, sell and donate. Half-used cleaning supplies may be needed at a local shelter. Donate wire hangers to Goodwill instead of filling your landfill. Just something to keep in mind :)  2. Downsize
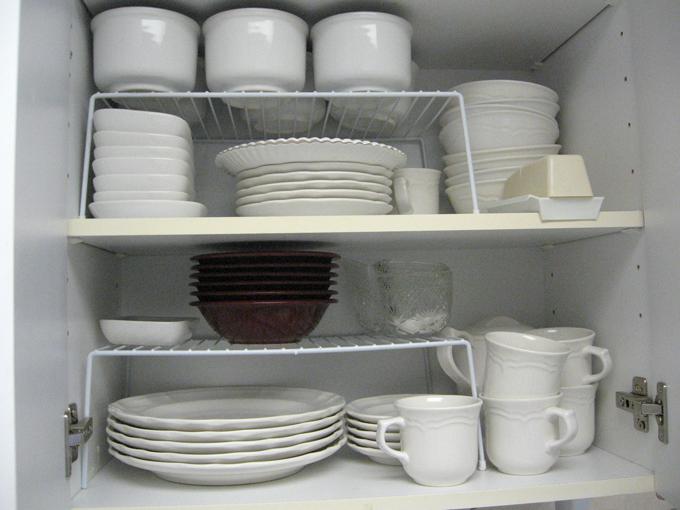
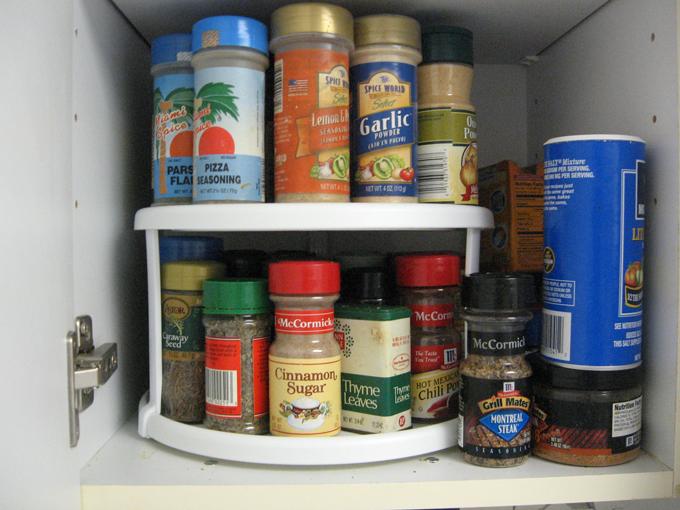
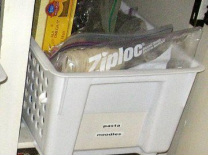
- Kitchen. One spatula, half a set of dishes, one wood spoon, one set of silverware. All your cookware should be multipurpose and not redundant. 4-cup and 8-cup coffee maker? Nope. Utilize lazy susans, plate stackers, and pull out drawers. I love having a bin in my fridge that holds all my stuff. It really helps separate from my roommate's foods.
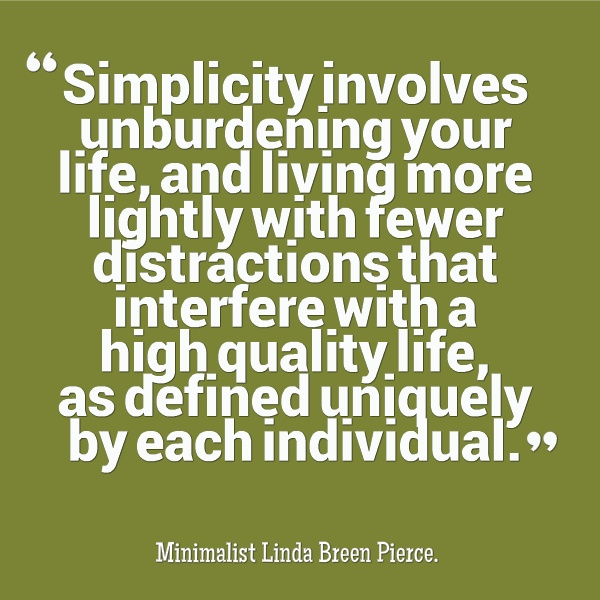
Having trouble parting with goods from guilt of impulse buys, nostalgia of half-completed projects, or feelings of obligation for gifts you didn't want? Check out this article at FrugalBeautiful for tips on how to deal with each type of item. I like these quotes from Lindsay at LifeHacker in her article 8 Things you Can Discard to Downsize Your Life: On Clothes in the Bottom 1/3 of your Dresser. >> "You don't need a T-shirt in order to prove you went to that conference, worked at that tech company, or volunteered at said event." On Memorabilia. >> "That cheap medal you got for completing the half marathon two years ago, the eiffel tower shot glass someone brought you from Paris, that copy of your college graduation announcement that you've saved. You don't need any of these things. Because guess what? Without them you'll still remember what it felt like to train for that half marathon or to have graduated from college. None of those memories are going anywhere. Donate or recycle this stuff — you won't miss it." 3. Decompress You did it! Clutter is emotionally draining. To make a decluttered, downsized lifestyle stick you need to figure out why its important for you. Small carbon footprint, better for the environment? A better role model for your children, a less materialistic life? For me, at this point in my life, it's feeling better. And less materialistic. Rejoice in your accomplishment and hold on to lessons you have learned - keep in mind what you have in your closet for your next shopping trip, make up practical rules for keeping your wardrobe in check. Utilize storage space for things you don't use as much (out of season clothes, pregnancy clothes, holiday dishes and servingware). Figure out what works for you. Make a plan, if that's what works for you. Make a list! Do what you need to do :) Blessings,  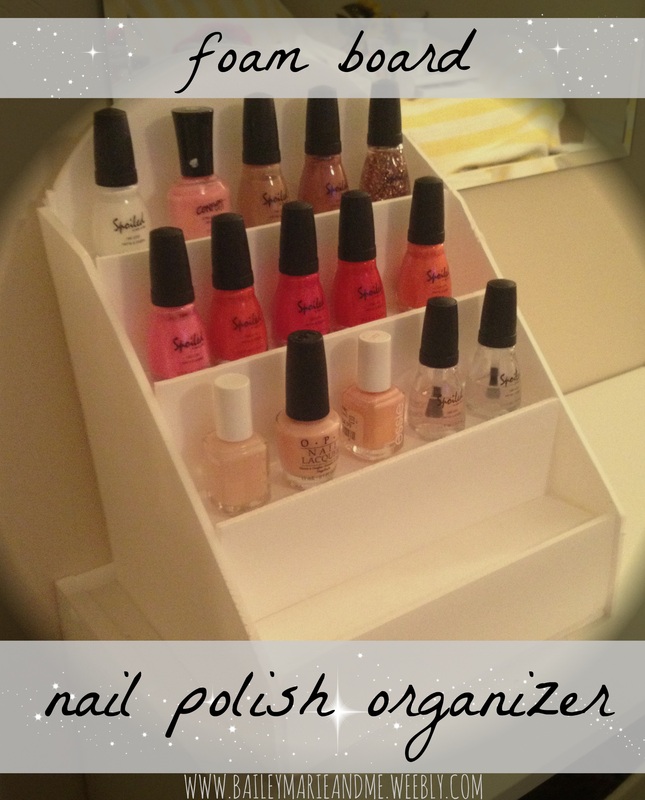
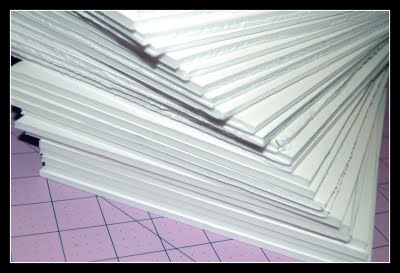
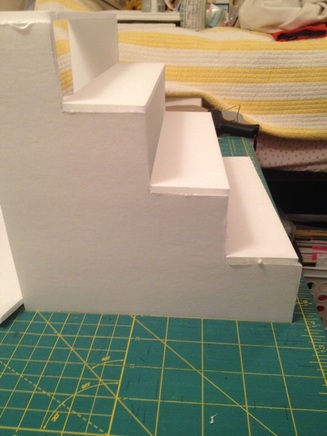
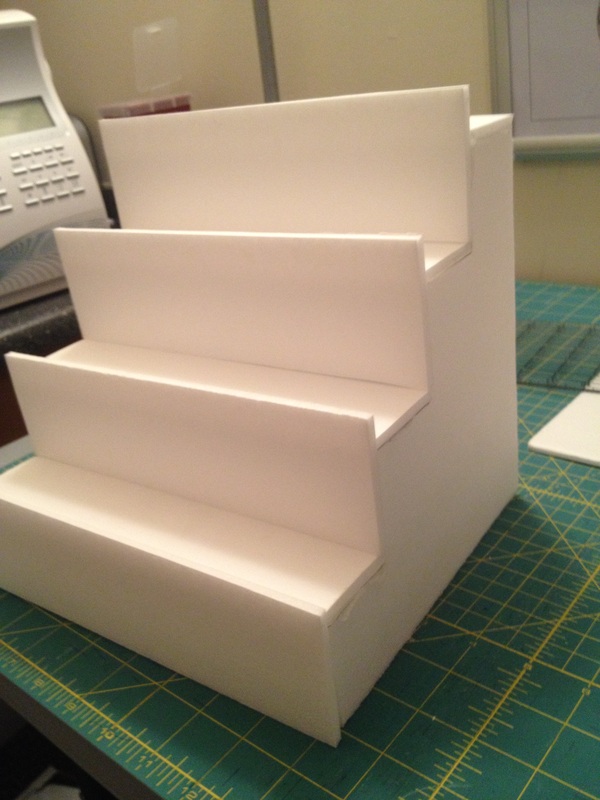
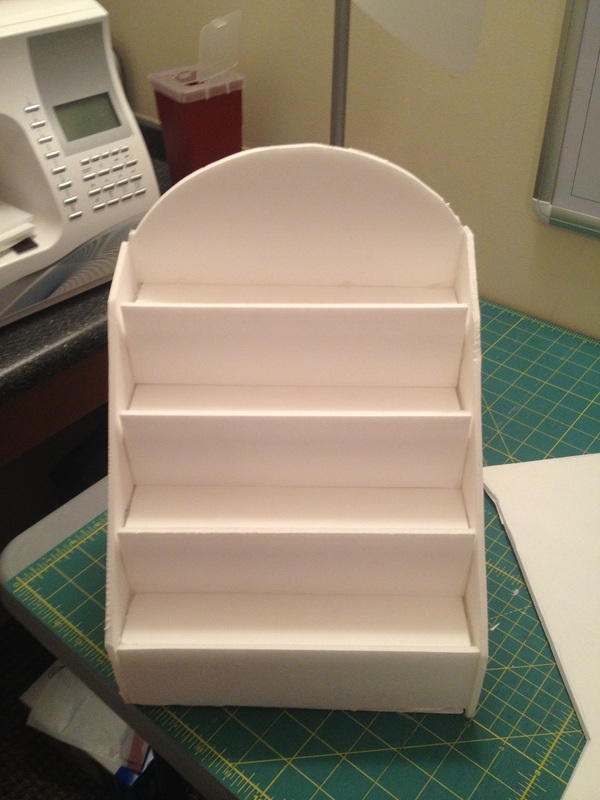
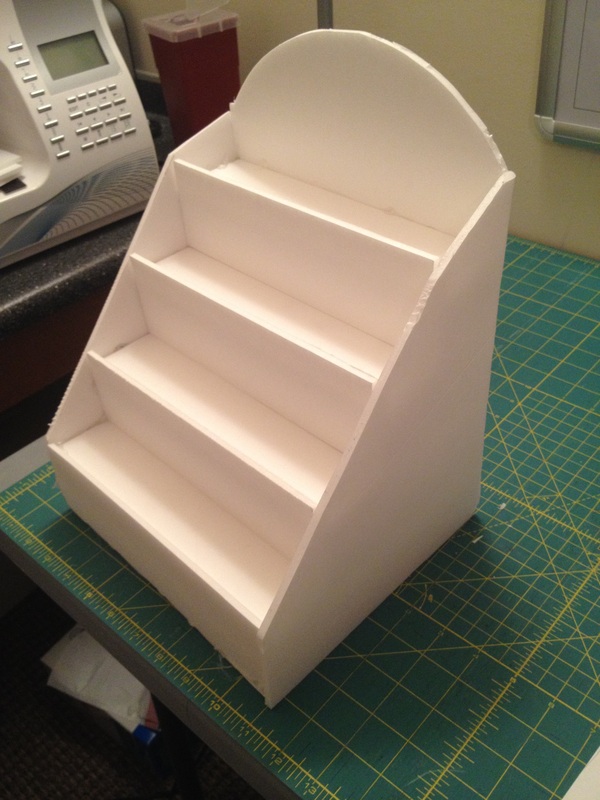
Have you seen the impressive things done with foam board these days? Perhaps you've seen the craft room storage - for markers, ink pads, shelves, you name it, they did it. I love the clean white look and how light the final product is. I was worried perhaps the hot glue would make it look, well, "icky", so I wanted to start with something small. I was impressed. There's all sorts of nail polish organizers you could build. You could make a big shelf type, like at the nail salon, and hang it on your wall. You could do simple stadium steps that span the length of a counter top. I don't have that many nail polish and wanted to keep it that way, and I also don't have alot of space in my room. So, voila, the final product! For something simple like this, I'll do the tutorial right here in the blog post. No need for a PDF. **Please do not copy or pin any tutorial images from this blog without linking back to me or naming my blog as the source. Feel free to pin the above main photo with my website already typed. Thank you! What You'll Need
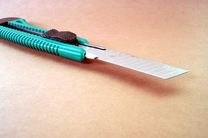
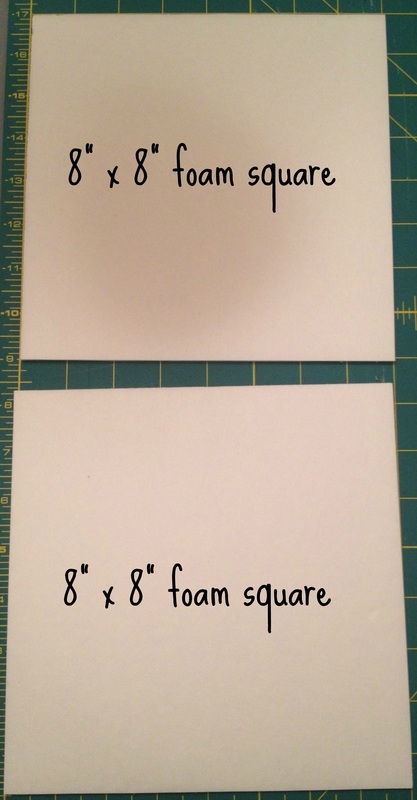
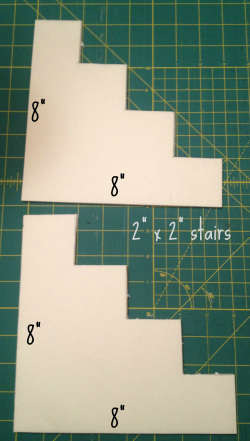
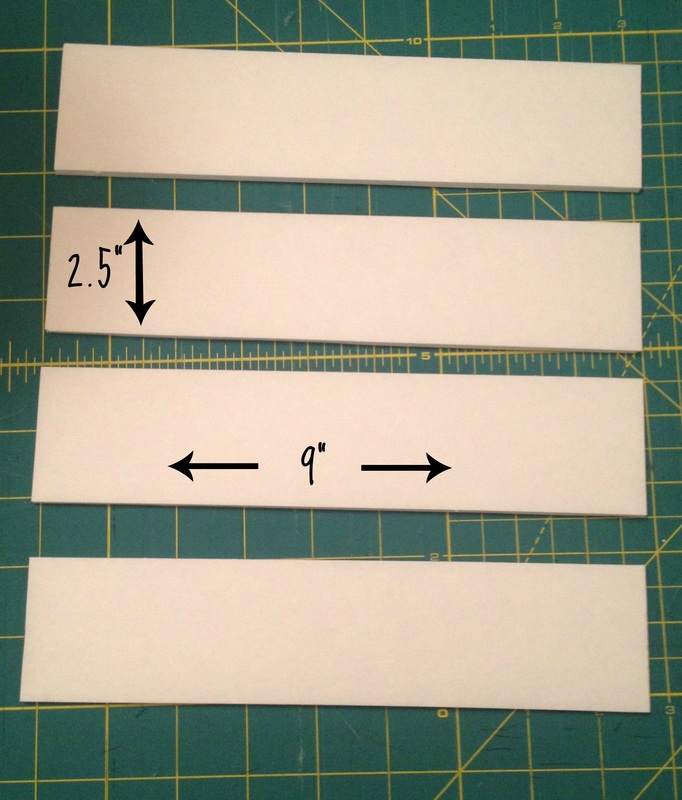
The Dollar Tree has black and white foam board as well as x-acto utility knifes with snap off blades and extra packs. I highly recommend purchasing these supplies from there because you'll save about $2 per foam board, and the foam board really wears down on the blades so you want the type that snaps-off. And you basically end up getting the knife holder with 3 sets of snap-off blades all for $1. Who can argue with that? Getting Started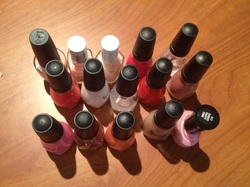 I wanted 4 shelves that fit 5 nail polish bottles with some extra room. To figure this out, I lined up my nail polish and played around with how I would want them arranged. Then I added an extra shelf so that I can buy a few more bottles and still be organized. Do you want 5 shelves? Or perhaps you want shelves that are longer and fit 10 bottles? This project is very adaptable. To build this, we'll be using 2" deep x 2" high shelves that are 9" across to fit 5 bottles. The pieces we will cut will include:
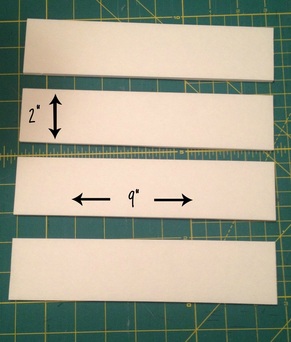
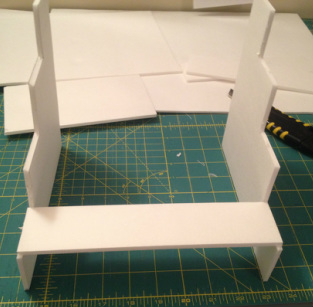
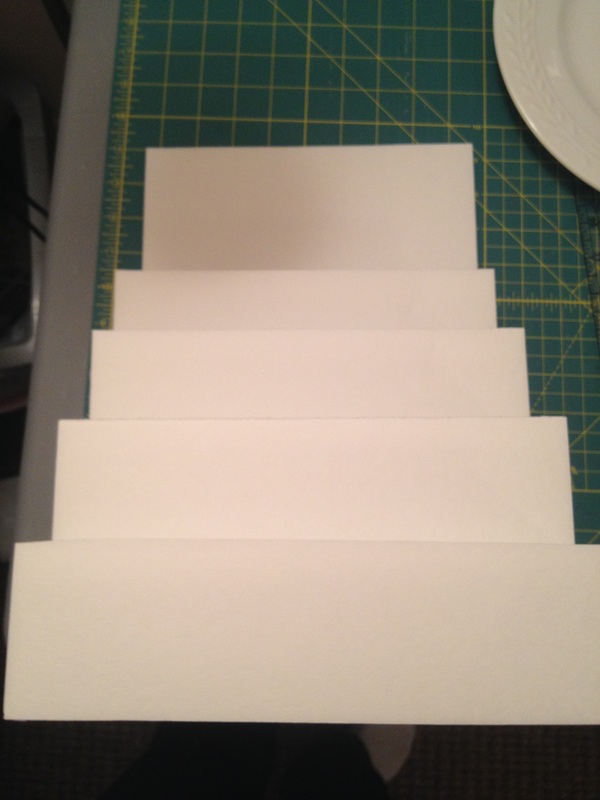
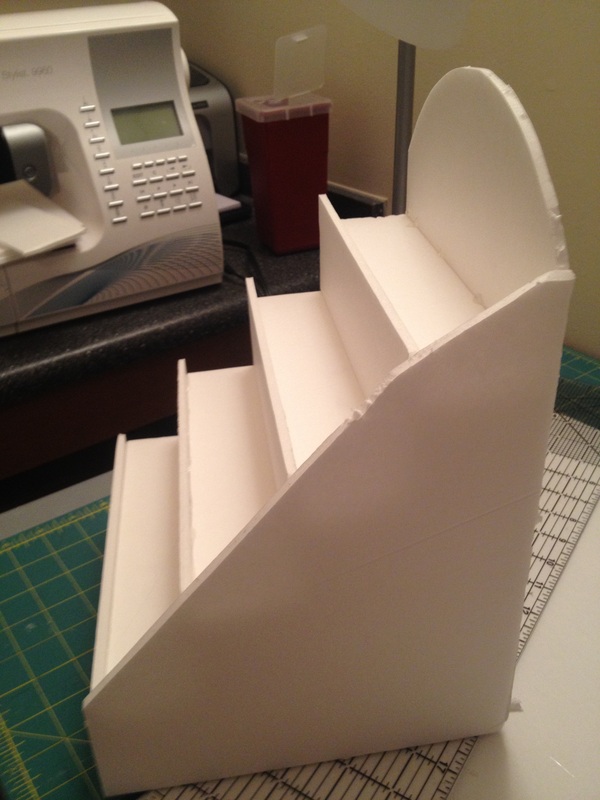
Cut 4 rectangles out of foam board that measure 2" by 9". These will be the bottom of the shelves. Put a line of hot glue on the top of each stair then press the edge of the step bottom down. Do the same on the other side. Take care to make sure they are straight. Continue with the other pieces.
Now cut 4 foam rectangles that measure 2.5" by 9". These will be the front of the shelves, and the extra 0.5" will form a little guard rail that will make sure nail polish won't just slip off. Using your hot glue gun, attach them to the front of the shelves.
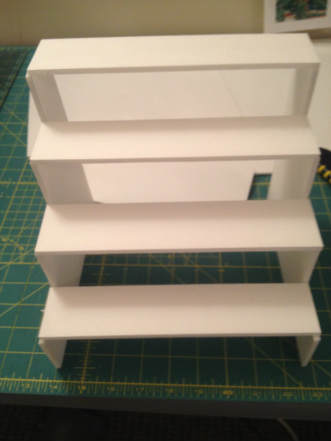
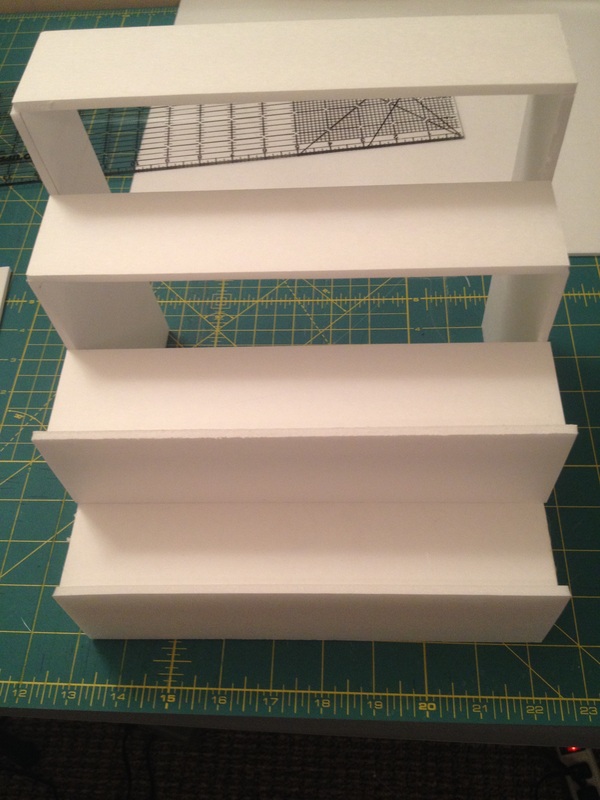
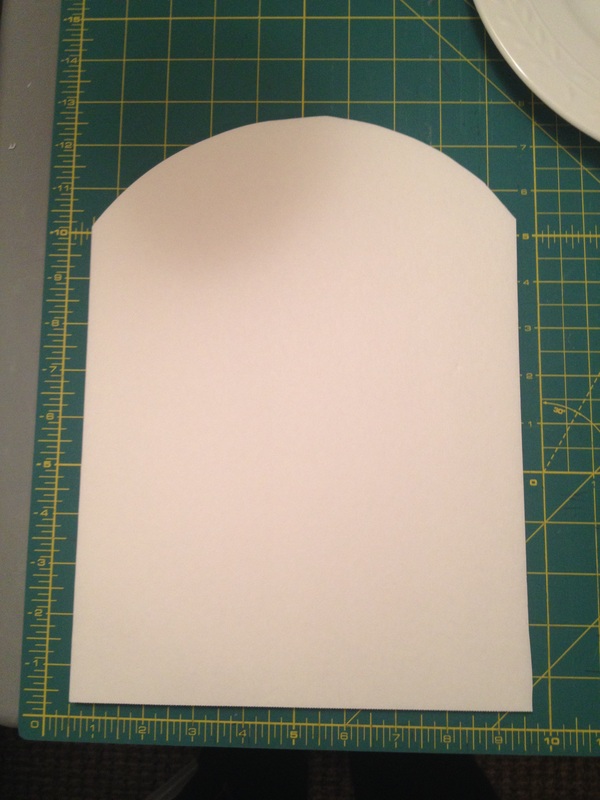
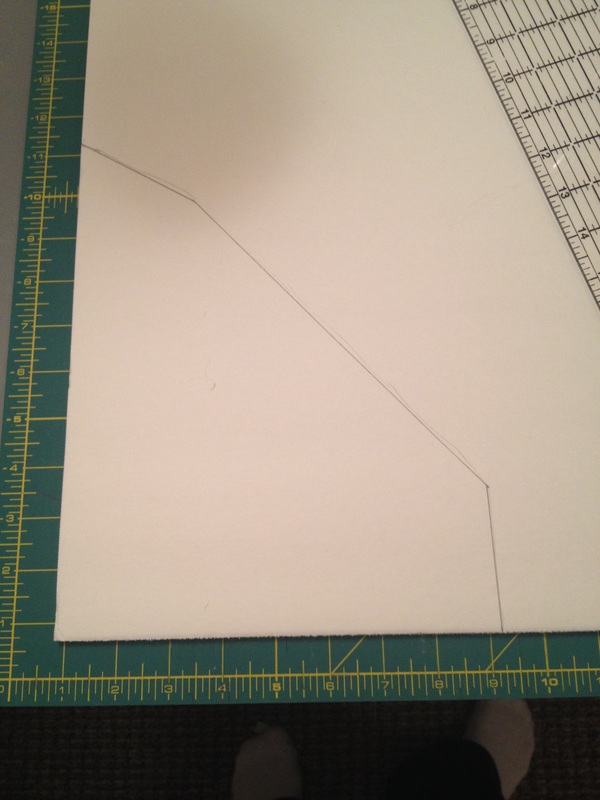
Now we will make the back. I wanted to have a decorative curve that extended behind the top shelf. You don't have to do that, but I suggest having a piece at least as tall as the 2.5" front guards behind it. Lay your shelf against a piece of foam board and trace around it, leaving however much on top that you like. To make the curved top, I used a large dinner plate. Make sure the edges of the curve are at even points at the sides or it will be crooked. Then glue down the sides. You want to make sure it is secure, but hot glue dries fast, so I suggest putting glue on two sides, pressing, and then using the tip of the glue gun to fill in the spaces and press.
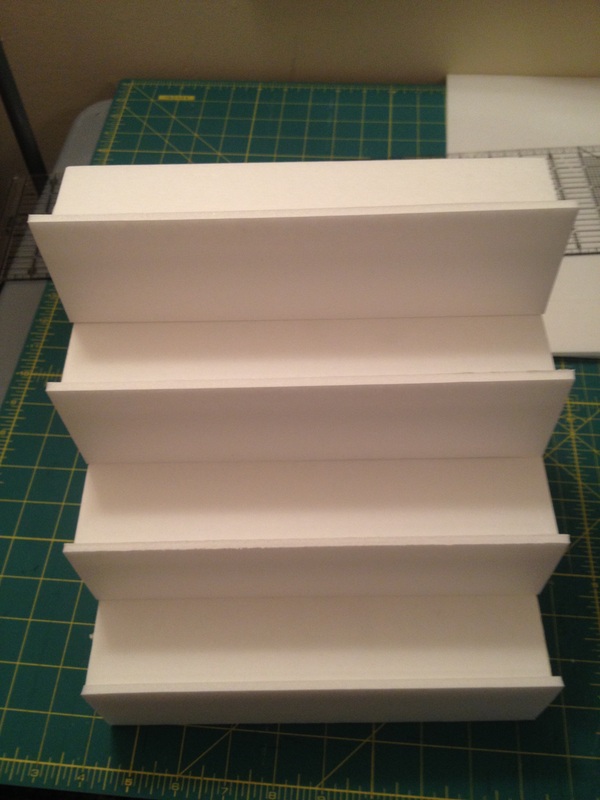
Next, the sides. Lay your shelf down sideways on a piece of foam board, and trace from the corner of the back portion down to the corner of the first shelf. Do this for each side, then glue on. You're done!
Voila, we are done. I hope you enjoyed this quick tutorial and have a new appreciation for what foam board can do. And if you're like me, you enjoyed the break from needle and thread. Have you ever made something like this from foam board? Leave a comment! Blessings, 
|
NewsletterSubscribers get first looks at new patterns, sales, giveaways, and more.
Archives
June 2022
Categories
All
Terms of Use: Please link back to my site if you use one of my original tutorials or photos!
|


 RSS Feed
