A Beginner's Guide to Cross Stitch
When I started cross stitch, I wish I had a beginners guide. But here are some things I've learned along the way that may be helpful to you. You can download my free Beginners Guide as a PDF by going to bit.ly/2MS53l7 or clicking the button below.
Here's a preview of some of the helpful things you'll find in the guide - not just for beginners!
|
|

|
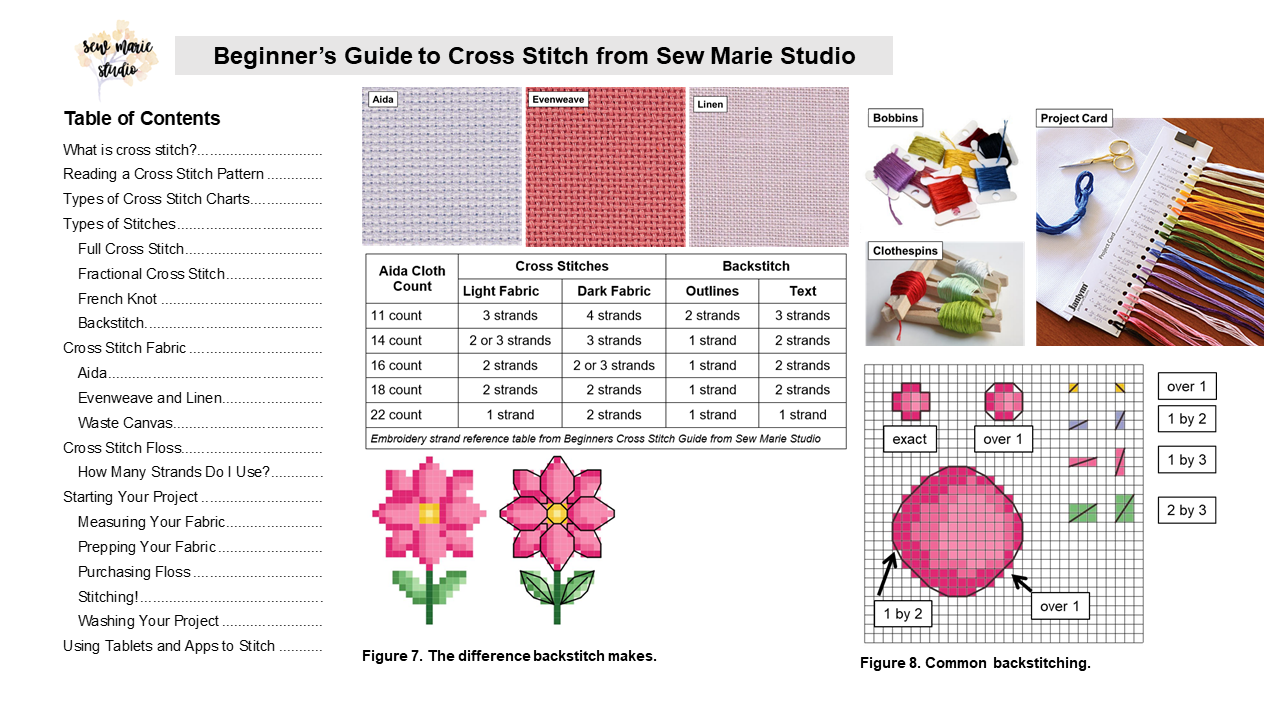
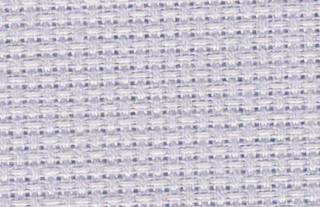
Aida cloth is the fabric you'll be stitching on, and it comes in different sizes. The threads are woven in such a way (even weave) that there are little holes and lines to see where to put your stitches, creating an even stitch. If you purchase a "kit" it will be included along with your thread and pattern. Otherwise, it can be purchased in a large piece (12 x 18 in, 15 x 18 in, or by the 30" yard). There are also different colors. Cream and Ecru are my favorite. I feel that White is too bright. Black is wonderful for holiday stitches with bright reds, golds, and whites. Can you imagine a holiday candle with pointsettas stitched on a black background? It would pop!
|
Stitch Count: You'll notice different numbers on the Aida cloth products, or perhaps even on your cross stitch chart. This number is the size of the weave, and refers to how many stitches could be made in 1 inch. The higher the number, the more stiches fit in 1", and the smaller the stitches. If you are a beginner, start with 11-count or 14-count. The next up is typically 18-count which is good for intermediate stitchers. 28-count weave and higher require very small stitches and incredibly careful counting. If you see a stitch count with measurements on your chart, the creator is telling you how big the design ends up being with different stitch counts. A design will be larger on a lower count (11-count = bigger stitches) and smaller on a higher count.
If they don't tell you how big the final design will be, you can figure it out this way: count the chart squares across and down. Then divide each number by your stitch count. Those are your design measurements. You can also do it the other way - you have a chart you like and an 8 x 10" frame to fit in, so choose a stitch count that will give you a 7 x 9" finished project. You'll want to have 3-5" of blank fabric on each side to finish it (we'll get to that later).
Example calculation:
150 squares across on 14 count weave = 150/14 = 10.7" across
150 squares across on 18 count weave = 150/18 = 8.3" across
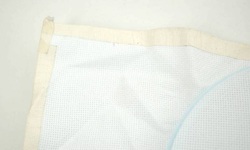
Preparing Aida Cloth: Aida cloth will fray at the ends. Always seal with masking tape before you begin! There are other products such as glue you can use, and some people will stitch across it with their sewing machine. I like masking tape.
|
Basting stitches: these are long loose stitches that are easy to take out. If you are doing a large project, basting 10 count squares will help with counting the cross stitches from your chart. You can also do this to mark the center of your fabric.
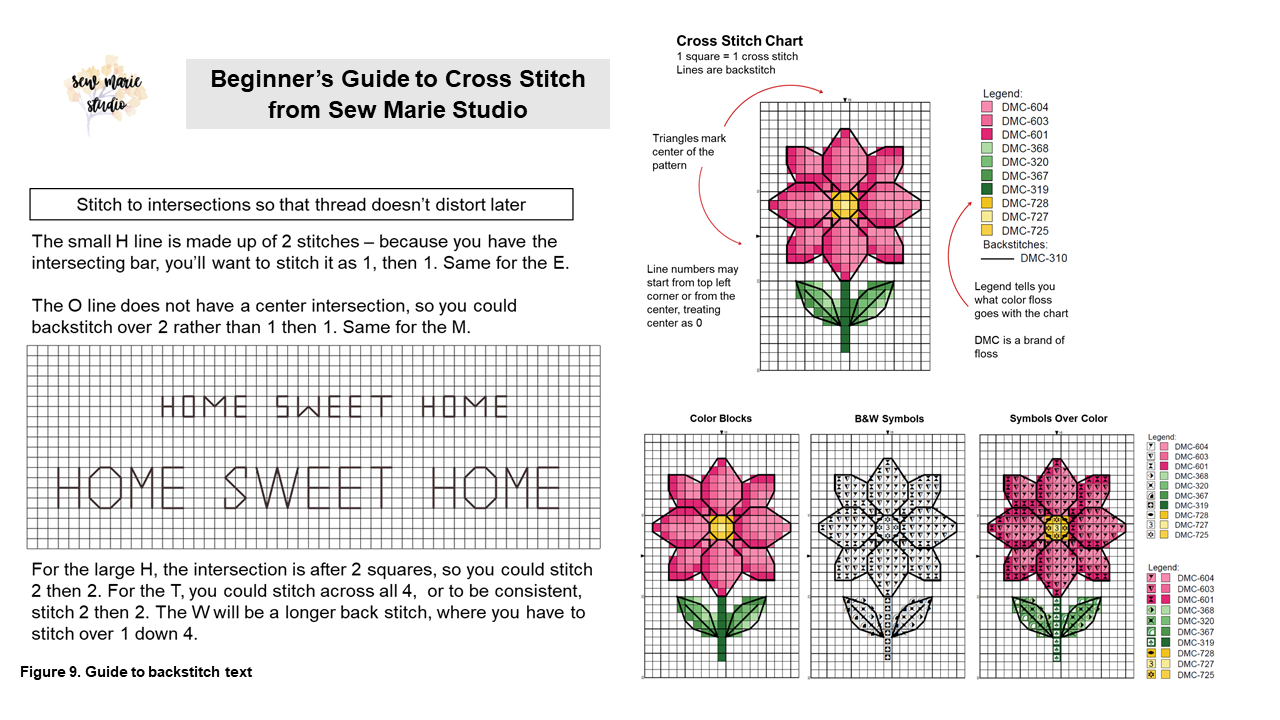
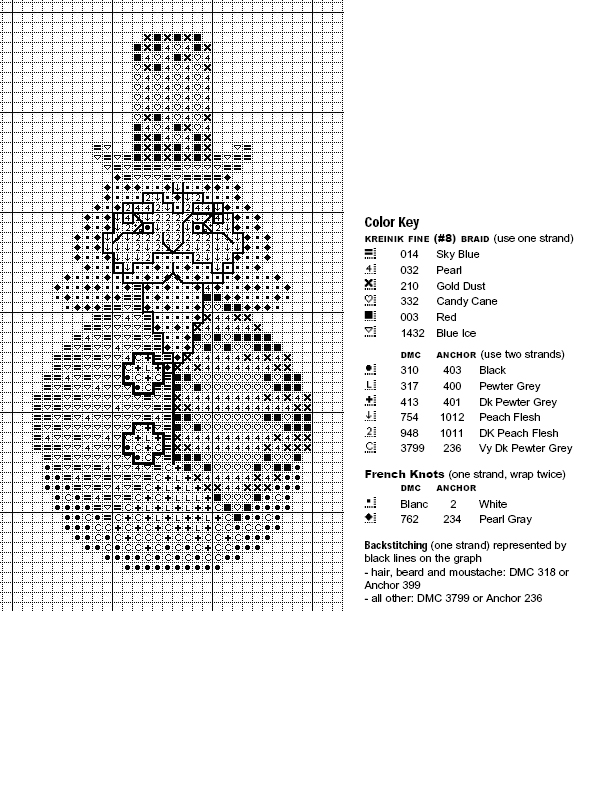
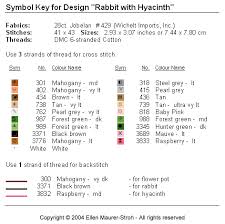
Color key: This will include a symbol, a number, and the color of the floss. The symbol is repeated in the chart wherever that color goes. The number corresponds to the number on the floss label.
|
Chart (or graph): This is where your cross stitch pattern is. It might be in color, with symbols, or in black and white with symbols that correspond to the color in the color key. Make sure you are careful to count your stitches. One square represents one stitch, and solid lines are back stitching to outline at the end.

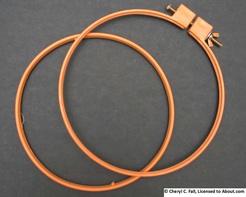
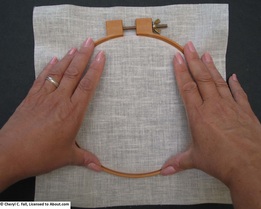
Embroidery hoop: these are two rings that fight together tightly and are adjusted by a screw on the side. They can be made of plastic or wood. The wood ones may warp or scratch your fabric if not smooth, but are adorable to display final projects as a "frame". To use them, take your fabric and center your working space (or the center - really wherever you will be stitching). Place the hoop with the screw and clamp on top of the fabric, and place the other hoop underneed. Fit them together and tighten the screw. Remember to remove your fabric from the hoop when you are done for the day otherwise you will leave creases.
|
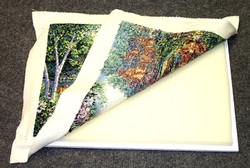
Seam allowance: this is the 3-5" of fabric I spoke of before, and it is important for finishing your project. It is the distance from the edge of your work to the cut edge of the cloth. Because you will likely transforming your project into a pillow, or framing it (and wrapping it around some sort of board in the process), you need to make sure you have enough fabric to do so! If you end up not having as much as you thought, you should sew scrap fabric on the edges to wrap around.
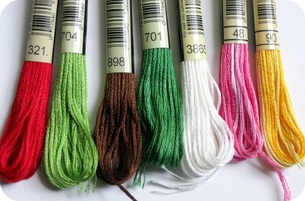
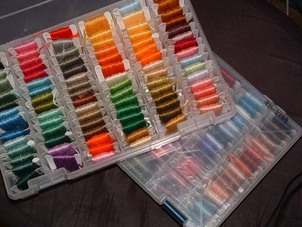
Embroidery floss separates into smaller threads (ply) and comes in lots of colors. The two major makers are DMC and Anchor, and you'll see these names referenced in your color chart. When you go to your local craft store, or online, you delineate between different colors by the numbers on your chart. If you choose to organize your for a project using a cardstock or cardboard card (punch holes, loop each color through the hole) you'll write the number and symbol from the color chart above each floss. You can also use specially made plastic cards to store your cards, and you should write the number on this card.
Ply: Embroidery floss typically has 6 plies of thread in 1 strand of floss, meaning you can separate 6 smaller threads from the 1 large strand of floss. Your cross stitch key will tell you how many plies to use. Typically you use 2 plies for the cross stitch and 1 for back stitching.
When you are ready to stitch, separate your plies first, and only cut pieces 15-18" long at a time or they will become knotted when you stitch.
|
|
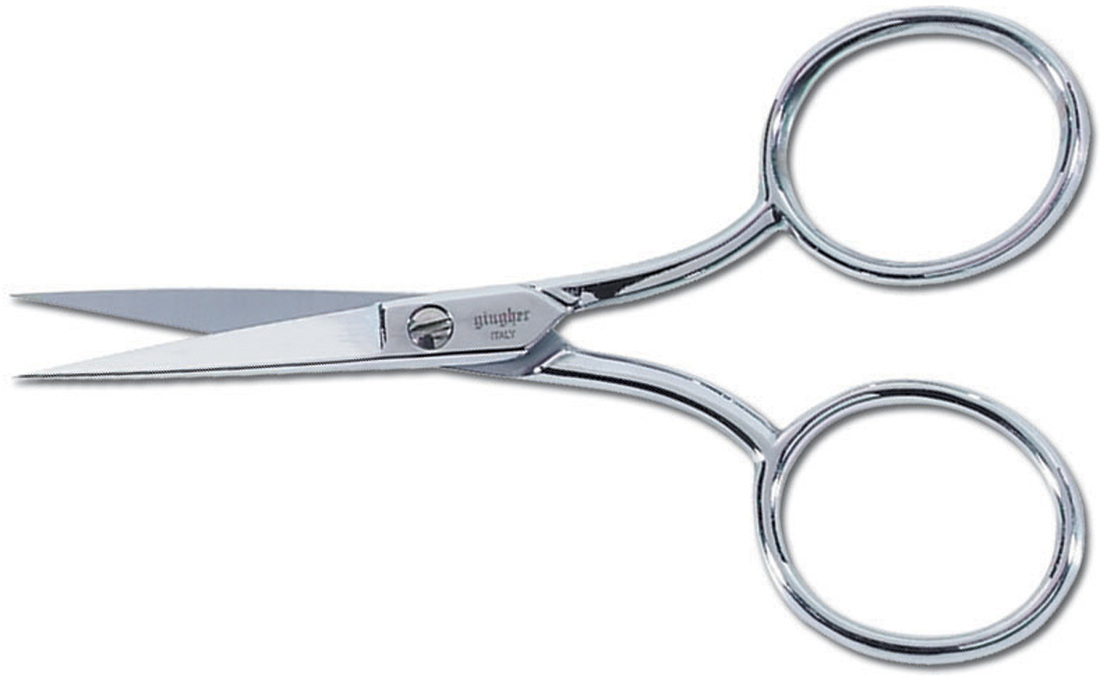
Needles & Scissors
Embroidery scissors: these are small sharp scissors. Sharp is important so that your floss has a clean edge and is easy to thread.
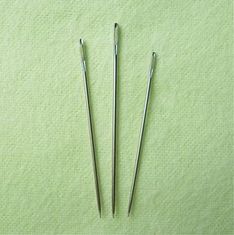
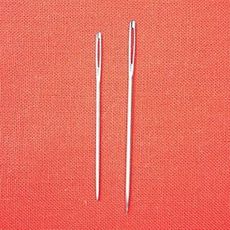
Tapestry needle: Tapestry needles have a large eye which is easier to thread floss through, and a blunt point which makes it easy to put through the holes in the Aida cloth. There are different sizes depending on (1) your fabric and (2) the embroidery floss ply you choose.
Tapestry needles aren't the same as embroidery needles. Embroidery needles are meant for free-hand embroidery not on Aida cloth where you need a sharp tip to puncture the fabric. Aida cloth has the holes where your needle should go, so we use the blunt tip tapestry needle. See photos below - embroidery needles (center), and tapestry needles (right).
|
|
|
Starting Your Project
Choose a chart, purchase your Aida cloth, needles, and the colors you need. I highly suggest you make a list of the colors and numbers you need. Typically if they are out of one color of dark green, you can go the next number over. Just make sure that isn't already being used in the chart! (Sometimes with leaves, flowers, etc. there are multiple hues of the same color used).
Cut your Aida cloth: Count the squares on your chart across and down. Sometimes every 10 squares is marked. Translate this into inches using the count of your Aida cloth. Add 5" for seam allowance.
Example: Your chart is 150 across and 207 down. You are using 14-count cloth.
150 across/14 count = 10.7" across -> 11" + 5" seam allowance = 16" across
207 down/14 count = 14.8" down -> 15" + 5" seam allowance = 20" down
So you would cut your Aida cloth 16" x 20".
Tape the sides of your cloth with masking tape.
Find the center of your Aida cloth by folding it in half each way. Mark with a pin. Then find the center of your chart by counting. You'll start here.
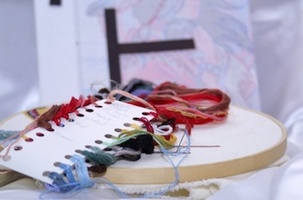
If you are doing a project with more than 5 colors of floss, I suggest making a project card. Use a piece of cardstock or cardboard (cereal box, anyone?) and punch holes in it. Loop your floss through each hole, and using a marker or pen write the number and symbol from your color key.
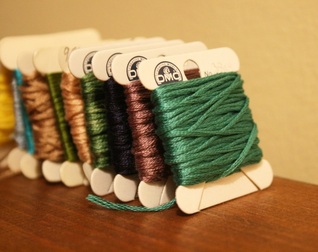
You can also use storage cards to wind your floss around, and then use the stickers or a sharpie to write the number. You can keep these together using Ziploc bags or metal rings.
I don't recommend just keeping them in the paper slips because they will slide out and become tangled. Take the time now to wind them around the cards or lengthen them out and run through the project card.
Your first stitch. Thread your needle with 2 ply. Do not tie a knot in the thread. Bring the thread up in the bottom left of the stitch you want to make, and pull through until about 2 inches is left under. Hold that 2 inches with your non-dominant hand and as you continue to make your stitches. After a few stitches it will be secured enough.
So for the actual cross stitch, it is easier than you might think. Read through the next few points before you start.
Starting at the bottom left, come up to the top right diagonally. This will always be your first stitch. If you switch and go bottom right to top left, and back and forth, the finished project will not look right. Your cross stitch should be looked at from a distance, and it will be noticeable if you did not make your stitches uniform.
Now look at your cross stitch chart. Do you have a horizontal line of all the same color? A big block? A vertical line? A diagonal line? Here are some tips on how to go about these with the thread you have on your needle in the most efficient way.
Horizontal line: Make all of your bottom left to top right diagonal stitches moving from left to right, then go back and do your bottom right to top left to finish the stitch. You'll have a row of 1-stitches until you move backwards. This is more efficient than making single cross stitches in a row.
Cut your Aida cloth: Count the squares on your chart across and down. Sometimes every 10 squares is marked. Translate this into inches using the count of your Aida cloth. Add 5" for seam allowance.
Example: Your chart is 150 across and 207 down. You are using 14-count cloth.
150 across/14 count = 10.7" across -> 11" + 5" seam allowance = 16" across
207 down/14 count = 14.8" down -> 15" + 5" seam allowance = 20" down
So you would cut your Aida cloth 16" x 20".
Tape the sides of your cloth with masking tape.
Find the center of your Aida cloth by folding it in half each way. Mark with a pin. Then find the center of your chart by counting. You'll start here.
If you are doing a project with more than 5 colors of floss, I suggest making a project card. Use a piece of cardstock or cardboard (cereal box, anyone?) and punch holes in it. Loop your floss through each hole, and using a marker or pen write the number and symbol from your color key.
You can also use storage cards to wind your floss around, and then use the stickers or a sharpie to write the number. You can keep these together using Ziploc bags or metal rings.
I don't recommend just keeping them in the paper slips because they will slide out and become tangled. Take the time now to wind them around the cards or lengthen them out and run through the project card.
Your first stitch. Thread your needle with 2 ply. Do not tie a knot in the thread. Bring the thread up in the bottom left of the stitch you want to make, and pull through until about 2 inches is left under. Hold that 2 inches with your non-dominant hand and as you continue to make your stitches. After a few stitches it will be secured enough.
So for the actual cross stitch, it is easier than you might think. Read through the next few points before you start.
Starting at the bottom left, come up to the top right diagonally. This will always be your first stitch. If you switch and go bottom right to top left, and back and forth, the finished project will not look right. Your cross stitch should be looked at from a distance, and it will be noticeable if you did not make your stitches uniform.
Now look at your cross stitch chart. Do you have a horizontal line of all the same color? A big block? A vertical line? A diagonal line? Here are some tips on how to go about these with the thread you have on your needle in the most efficient way.
Horizontal line: Make all of your bottom left to top right diagonal stitches moving from left to right, then go back and do your bottom right to top left to finish the stitch. You'll have a row of 1-stitches until you move backwards. This is more efficient than making single cross stitches in a row.
|

|
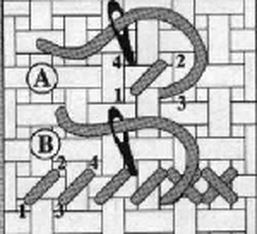
Vertical line: Make all of your stitches bottom left to top right downwards, and then complete them going back up.
Big block: Make all of your bottom left to top right diagonal stitches moving left to right. Then move down a row and go top right to bottom left. Move down, go bottom left to top right. On and on. Then go backwards and finish the stitches. You could also do them vertically.
Diagonal line: Complete all of your stitches one at a time.

