
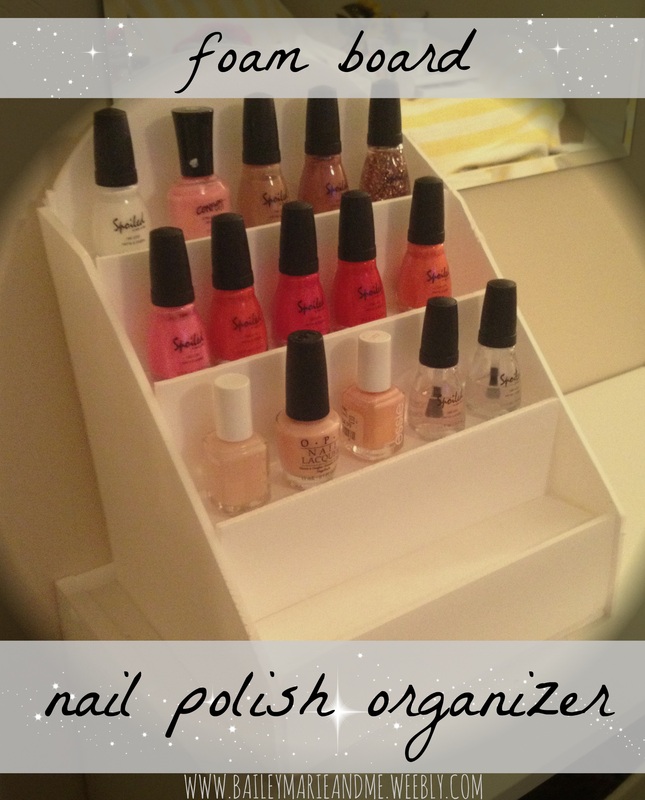
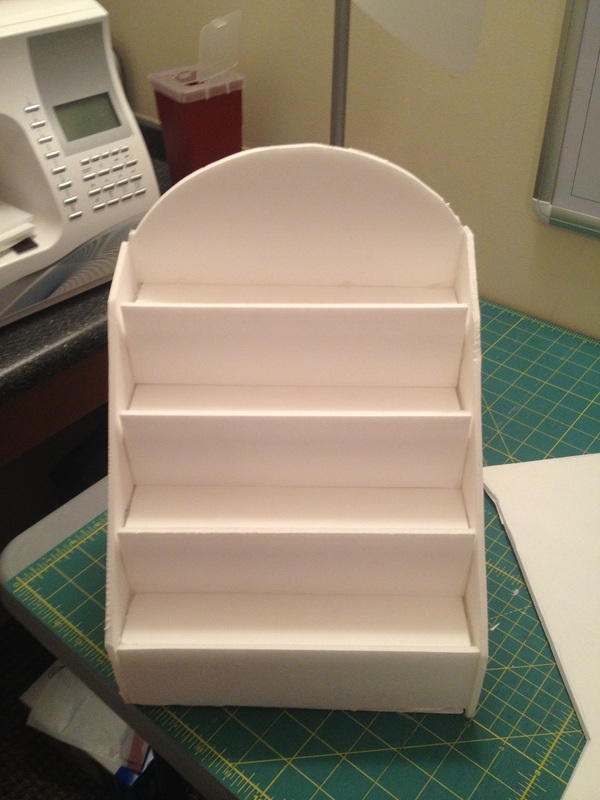
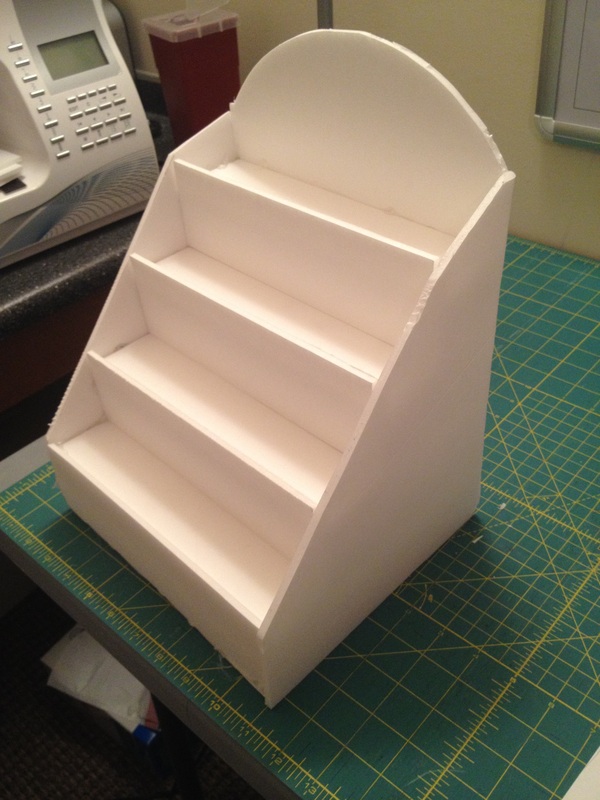
Have you seen the impressive things done with foam board these days? Perhaps you've seen the craft room storage - for markers, ink pads, shelves, you name it, they did it. I love the clean white look and how light the final product is. I was worried perhaps the hot glue would make it look, well, "icky", so I wanted to start with something small. I was impressed. There's all sorts of nail polish organizers you could build. You could make a big shelf type, like at the nail salon, and hang it on your wall. You could do simple stadium steps that span the length of a counter top. I don't have that many nail polish and wanted to keep it that way, and I also don't have alot of space in my room. So, voila, the final product! For something simple like this, I'll do the tutorial right here in the blog post. No need for a PDF. **Please do not copy or pin any tutorial images from this blog without linking back to me or naming my blog as the source. Feel free to pin the above main photo with my website already typed. Thank you! What You'll Need
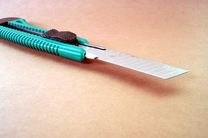
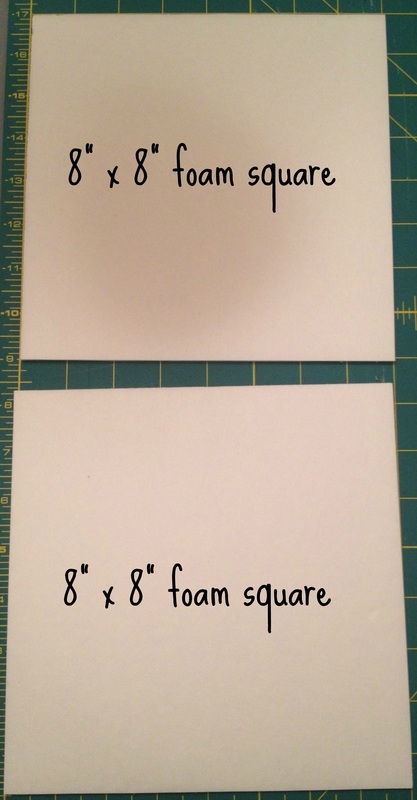
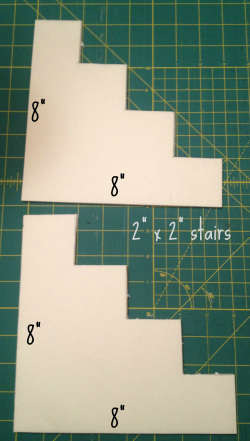
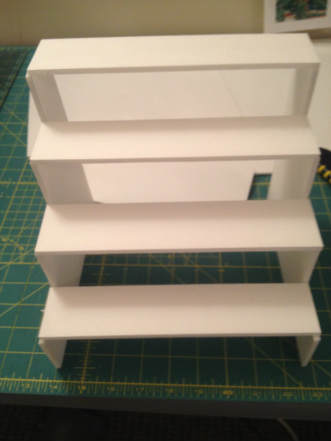
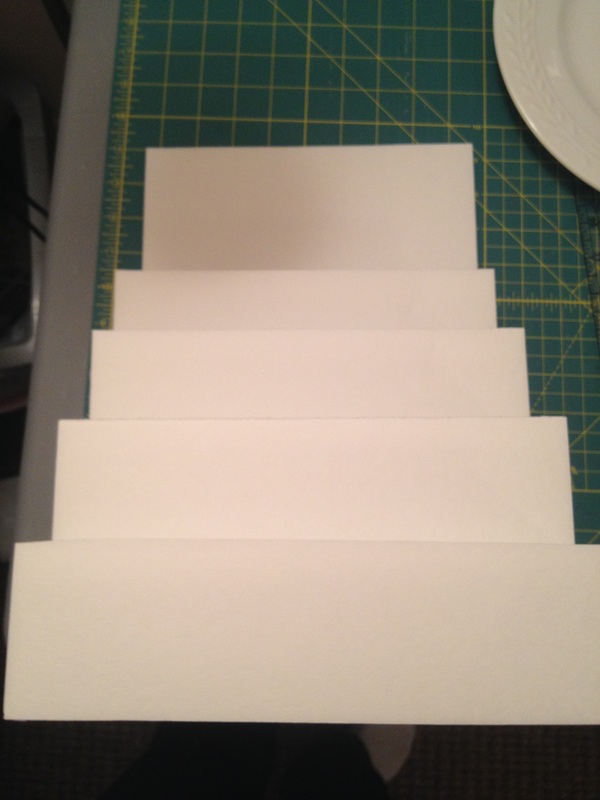
The Dollar Tree has black and white foam board as well as x-acto utility knifes with snap off blades and extra packs. I highly recommend purchasing these supplies from there because you'll save about $2 per foam board, and the foam board really wears down on the blades so you want the type that snaps-off. And you basically end up getting the knife holder with 3 sets of snap-off blades all for $1. Who can argue with that? Getting Started I wanted 4 shelves that fit 5 nail polish bottles with some extra room. To figure this out, I lined up my nail polish and played around with how I would want them arranged. Then I added an extra shelf so that I can buy a few more bottles and still be organized. Do you want 5 shelves? Or perhaps you want shelves that are longer and fit 10 bottles? This project is very adaptable. To build this, we'll be using 2" deep x 2" high shelves that are 9" across to fit 5 bottles. The pieces we will cut will include:
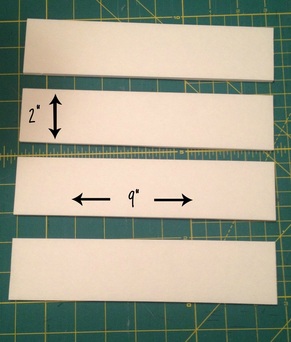
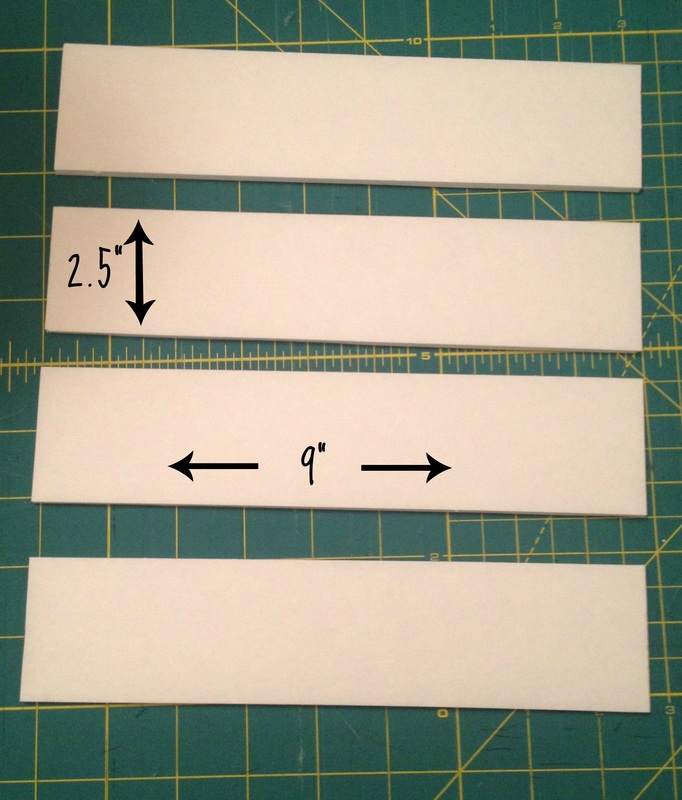
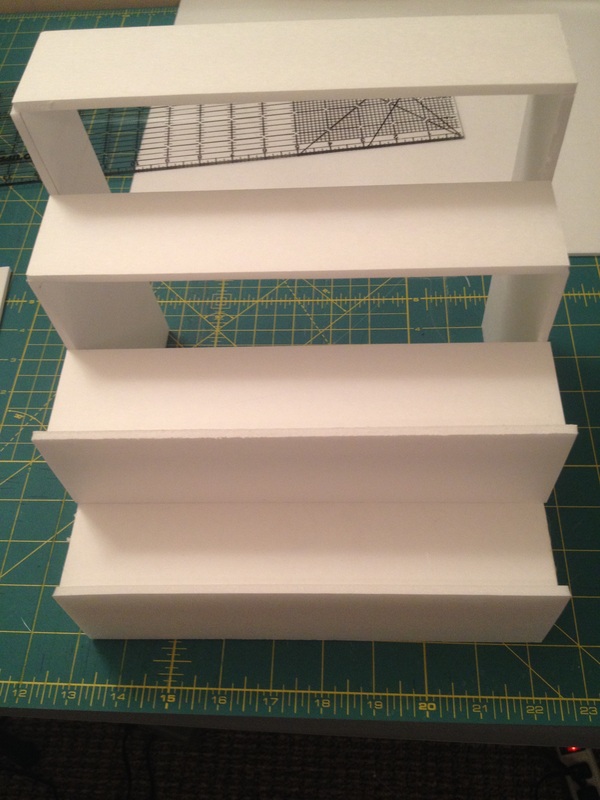
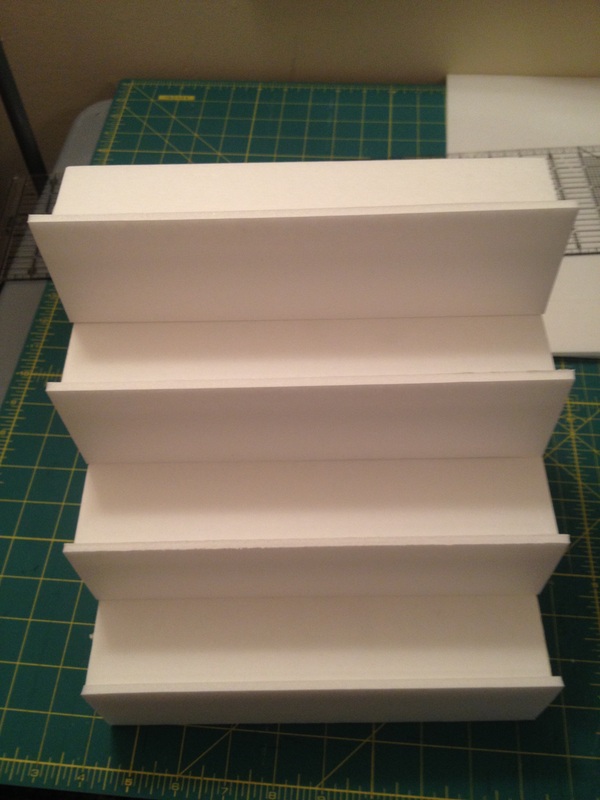
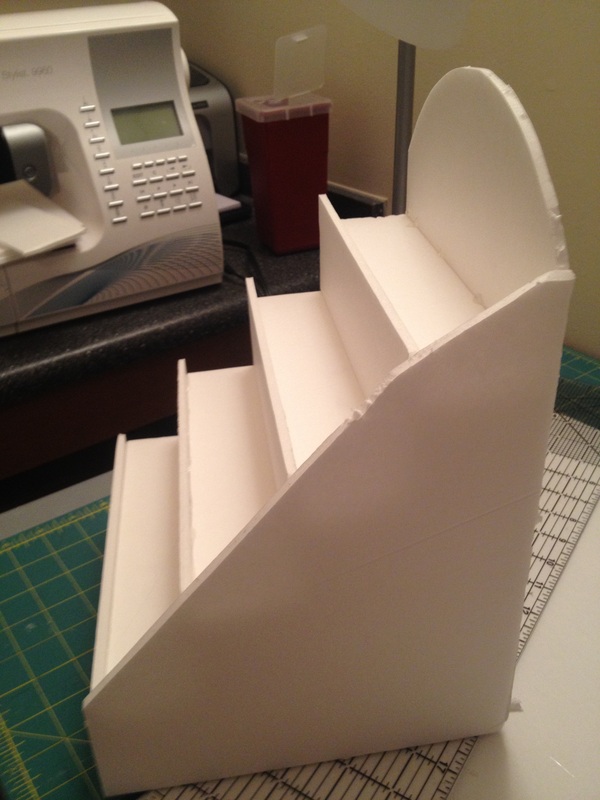
Cut 4 rectangles out of foam board that measure 2" by 9". These will be the bottom of the shelves. Put a line of hot glue on the top of each stair then press the edge of the step bottom down. Do the same on the other side. Take care to make sure they are straight. Continue with the other pieces.
Now cut 4 foam rectangles that measure 2.5" by 9". These will be the front of the shelves, and the extra 0.5" will form a little guard rail that will make sure nail polish won't just slip off. Using your hot glue gun, attach them to the front of the shelves.
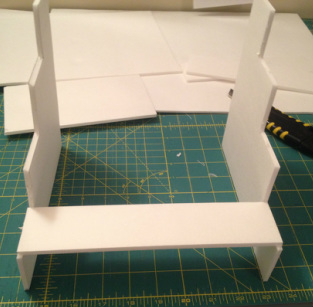
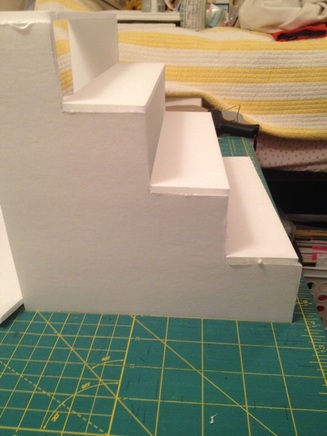
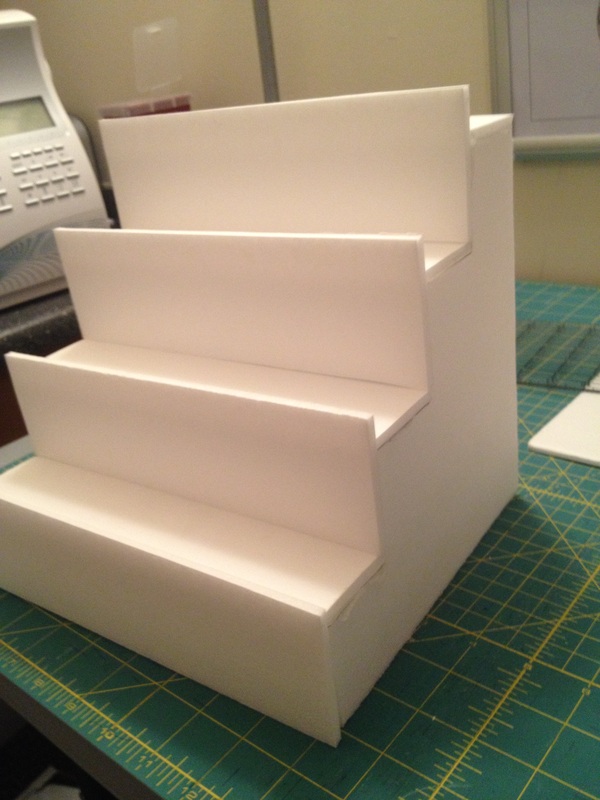
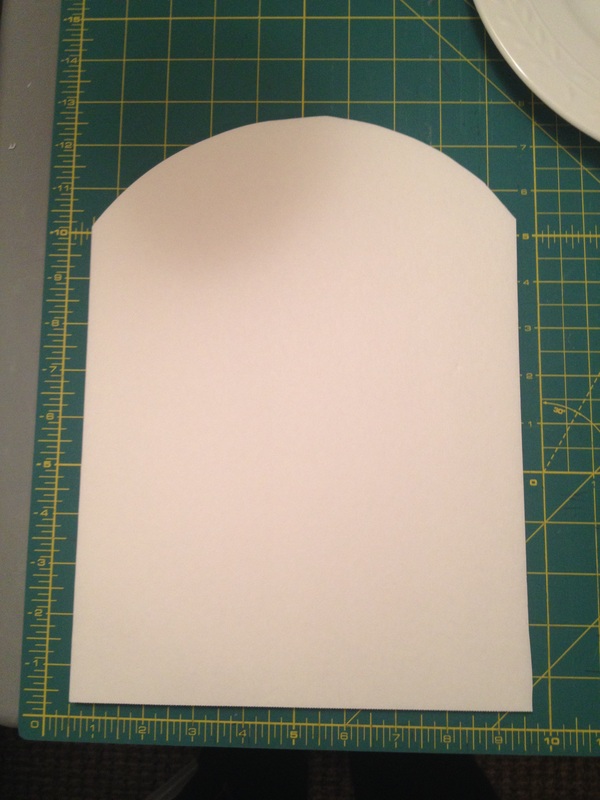
Now we will make the back. I wanted to have a decorative curve that extended behind the top shelf. You don't have to do that, but I suggest having a piece at least as tall as the 2.5" front guards behind it. Lay your shelf against a piece of foam board and trace around it, leaving however much on top that you like. To make the curved top, I used a large dinner plate. Make sure the edges of the curve are at even points at the sides or it will be crooked. Then glue down the sides. You want to make sure it is secure, but hot glue dries fast, so I suggest putting glue on two sides, pressing, and then using the tip of the glue gun to fill in the spaces and press.
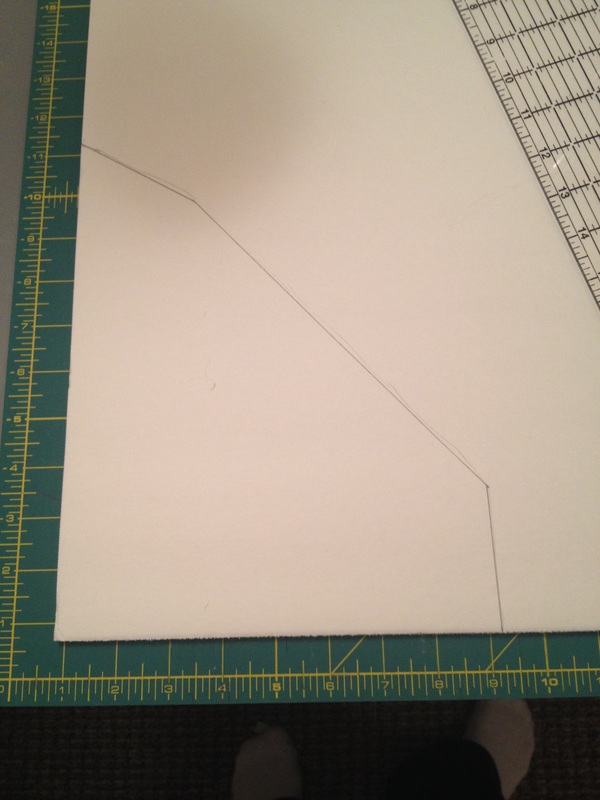
Next, the sides. Lay your shelf down sideways on a piece of foam board, and trace from the corner of the back portion down to the corner of the first shelf. Do this for each side, then glue on. You're done!
Voila, we are done. I hope you enjoyed this quick tutorial and have a new appreciation for what foam board can do. And if you're like me, you enjoyed the break from needle and thread. Have you ever made something like this from foam board? Leave a comment! Blessings, 
0 Comments
|
Archives
August 2022
Categories
All
Terms of Use: Please link back to my site if you use one of my original tutorials or photos!
|


 RSS Feed
